_811205.png)
_e196d8.png)
_32b3d9.png)
_1c53fe.png)

When Liquid Glass launched in macOS Tahoe, Apple faced criticism over how the design looked on the Mac. Some people felt that Liquid Glass in macOS Tahoe was an afterthought with little impact from the design update, while others had issues with contrast, readability, rounded corners, and design consistency. There were long complaint threads on the MacRumors forums and on Reddit, and some people refused to update.
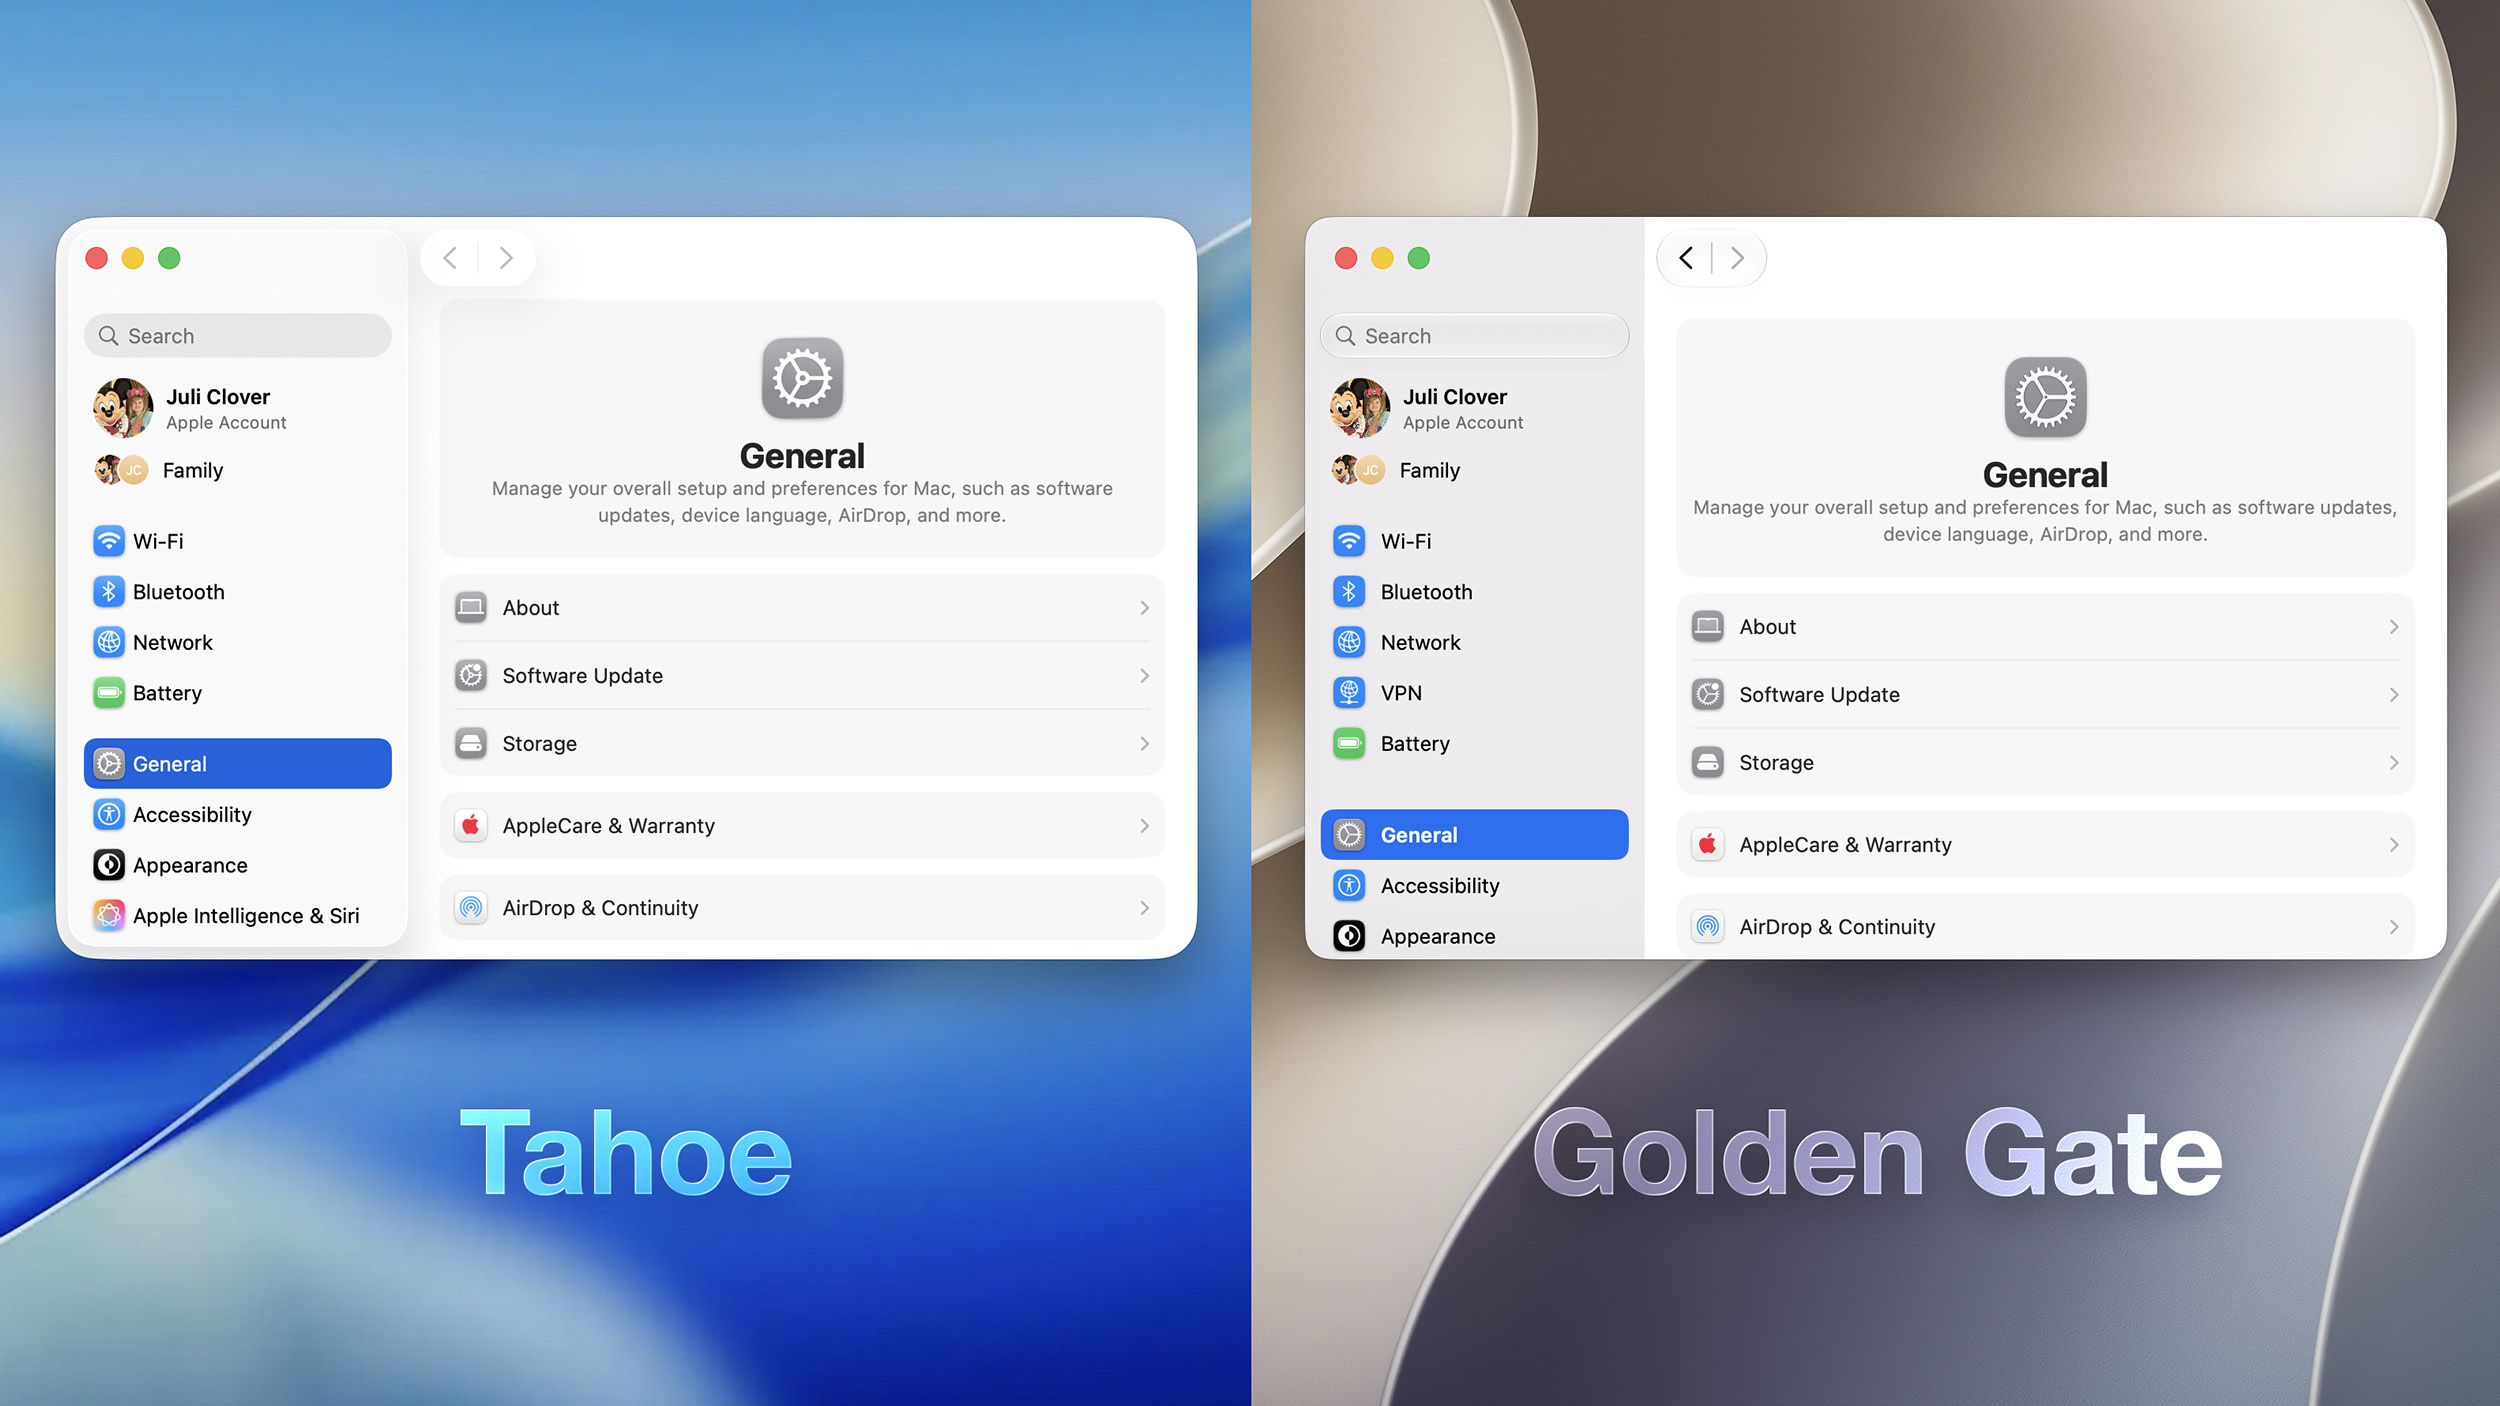
Apple is making several changes to Liquid Glass and the overall macOS Golden Gate design, and while subtle, some of the changes could make Liquid Glass on Mac easier to digest.
Apple added a full Liquid Glass slider under System Settings > Appearance. It changes the translucency of Liquid Glass elements, and users can choose a clear version of Liquid Glass that allows some of the background to show through, select a more opaque, tinted version that improves the legibility of text, or choose something in between.
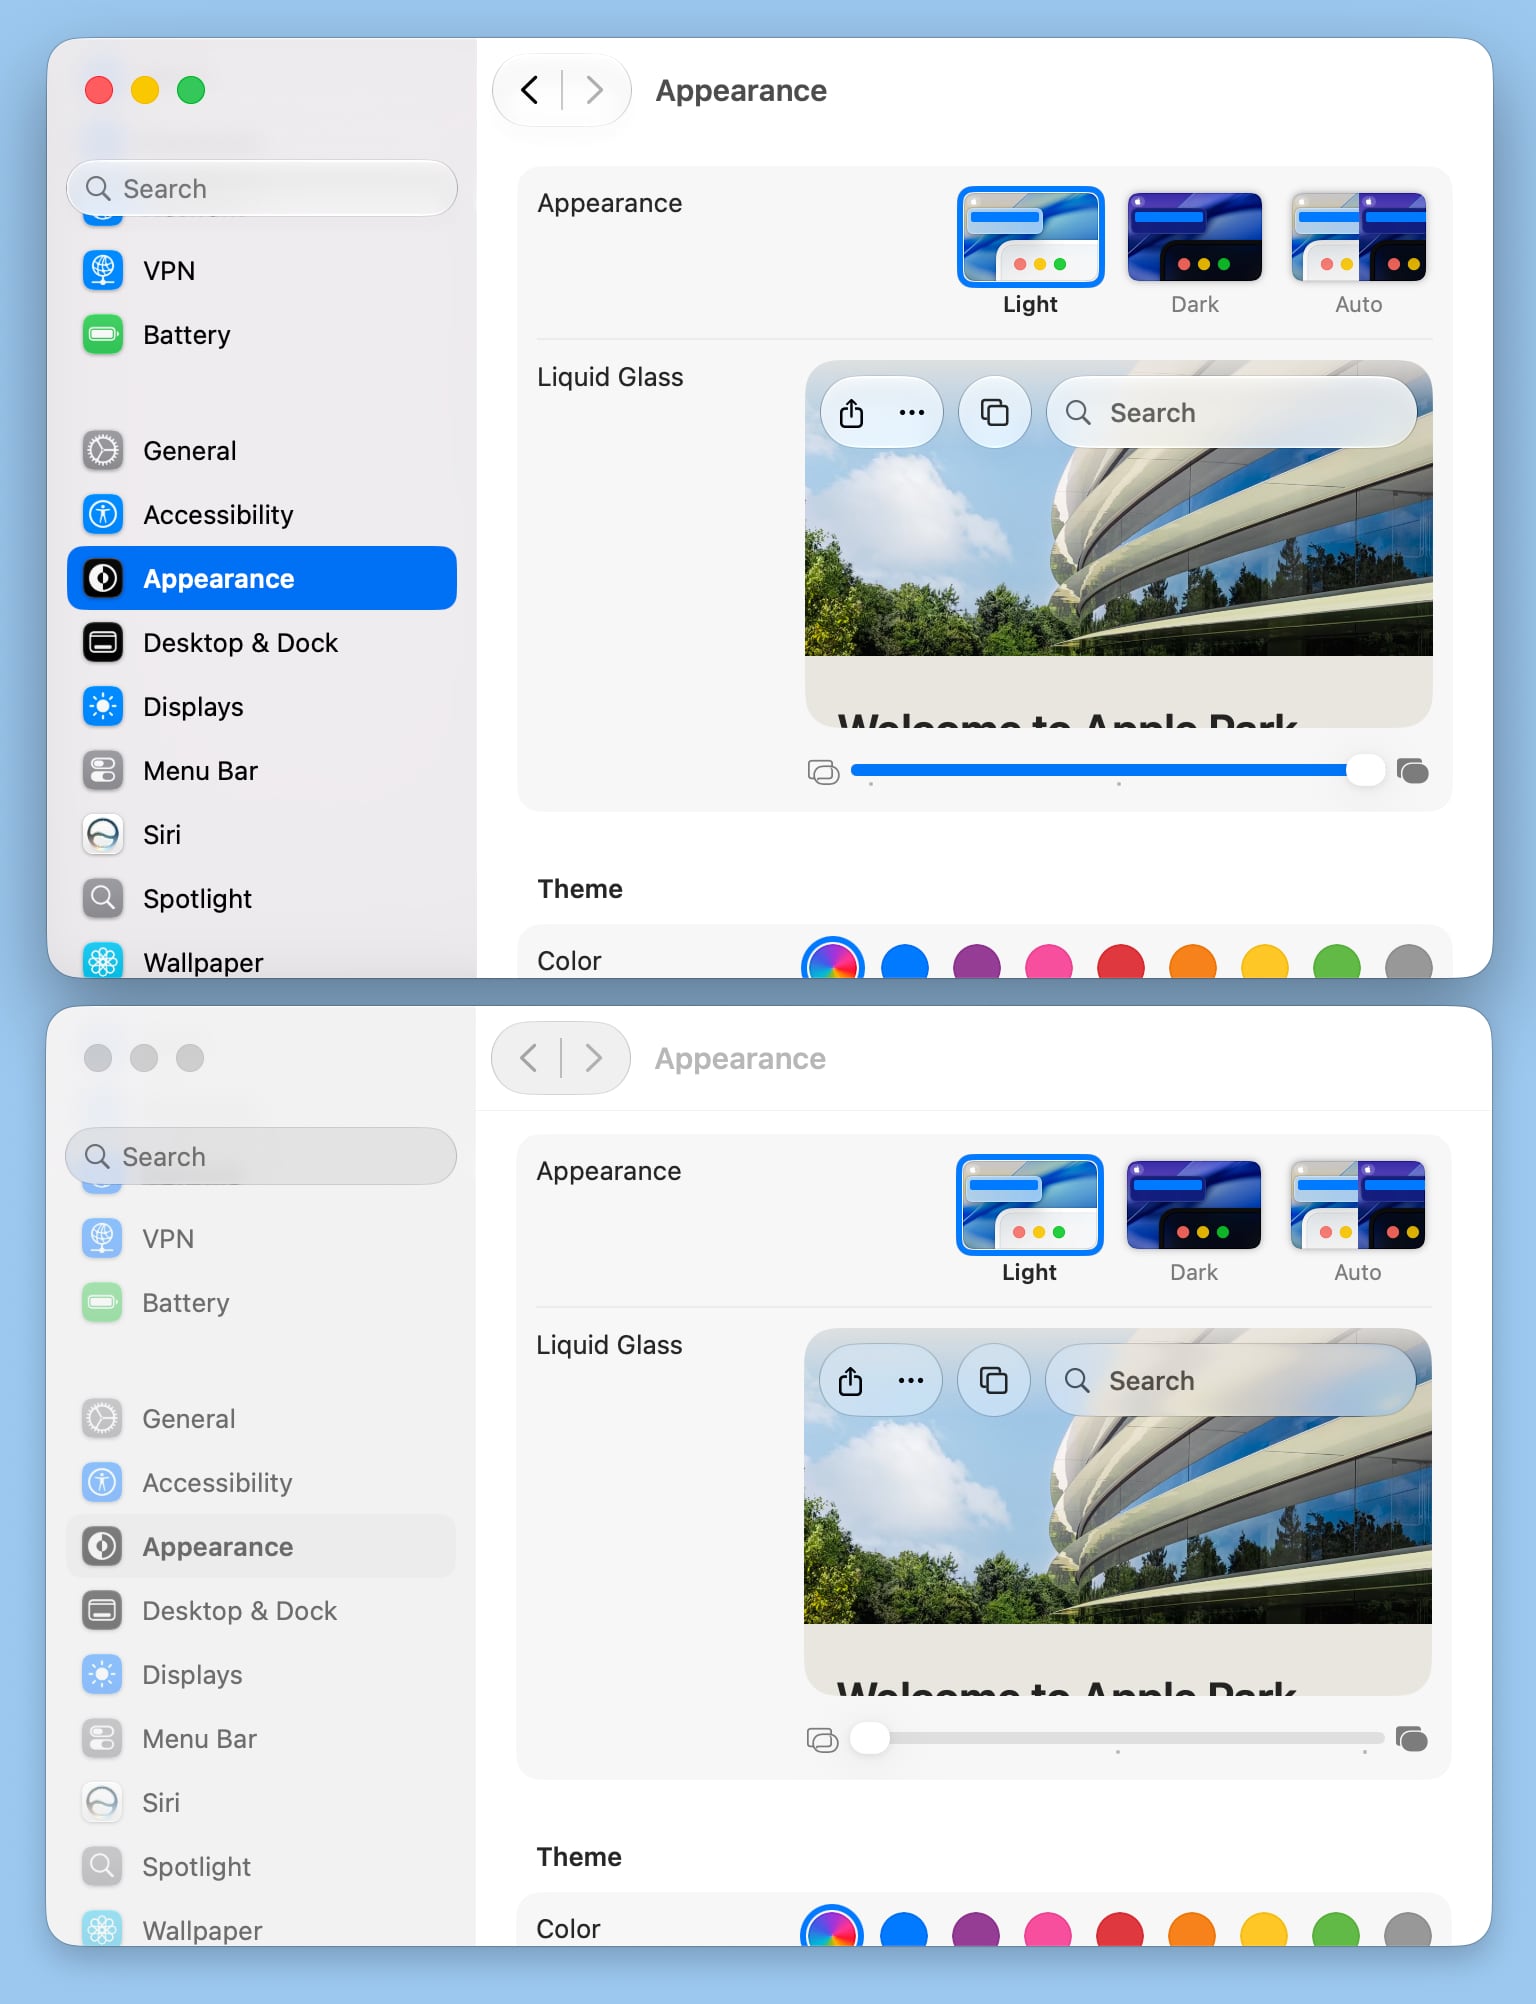
Unfortunately, there is no ultra-clear version of Liquid Glass available with the slider. Even the setting that's as clear as possible does not match the original version of Liquid Glass that Apple showed off at WWDC 2025.
Apple changed the overall Liquid Glass opacity, and it now diffuses complex content more effectively. Apple says a darkened edge and brighter specular highlights establish more depth and separation for the UI.
Apps have uniform toolbars to make text headings and groups of controls more legible. Windows also all have the same corner radius for more consistency between apps.
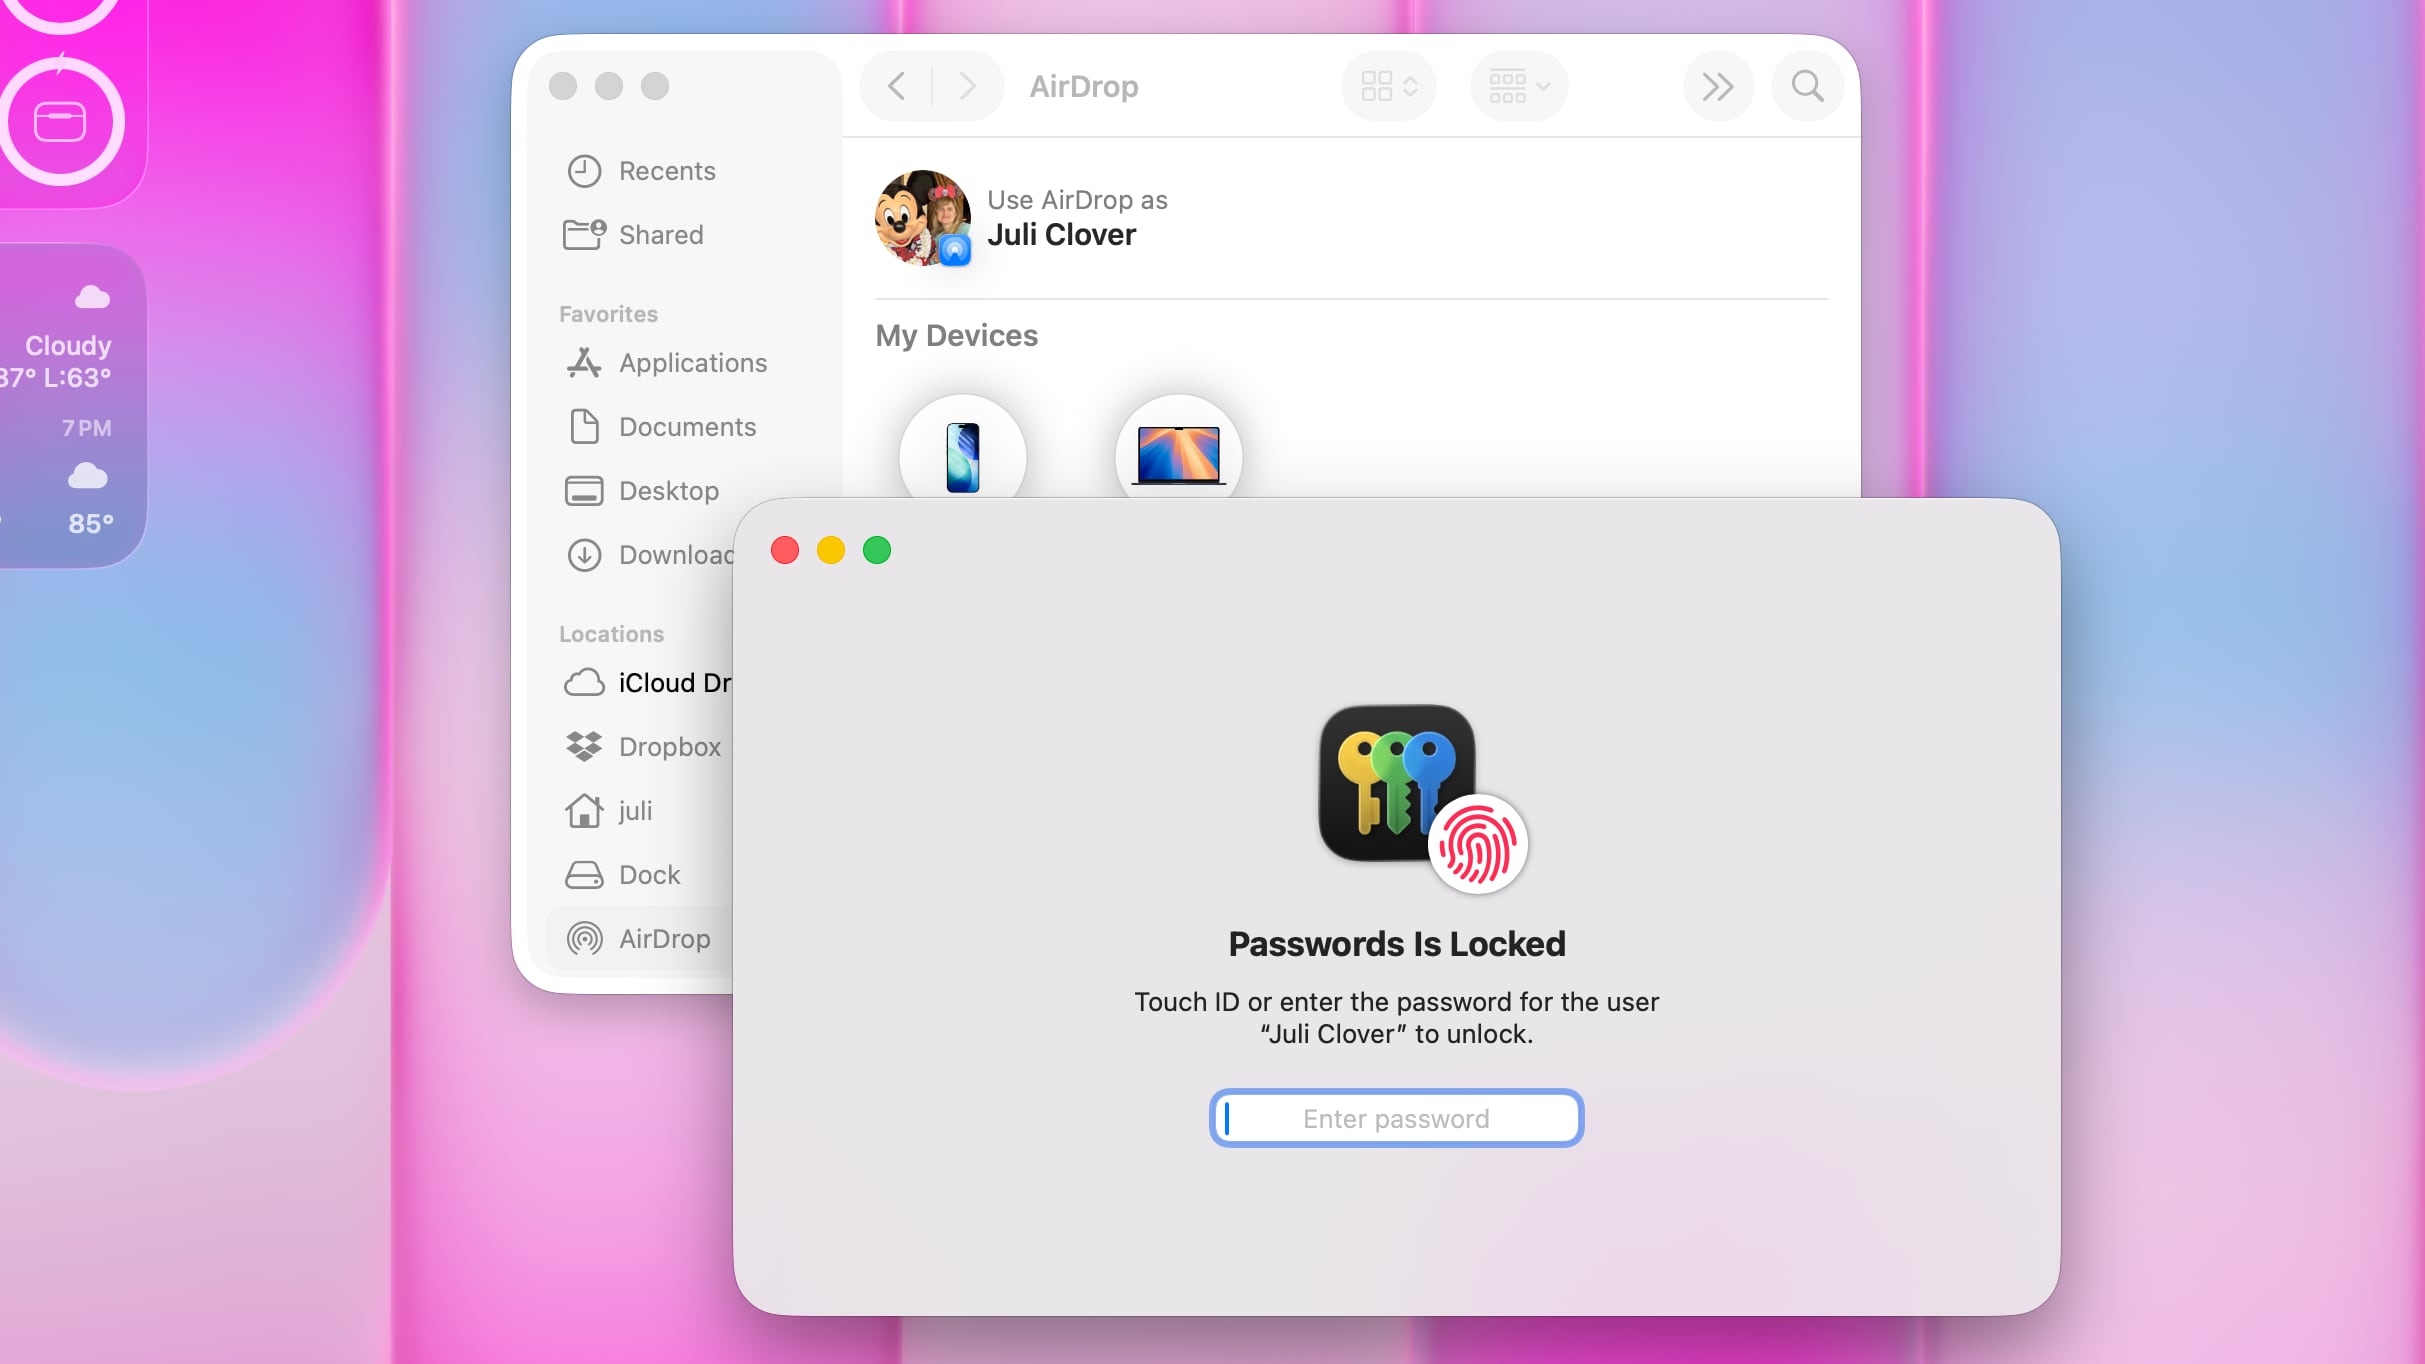 macOS Tahoe
Corners of apps are not as dramatically rounded in macOS Golden Gate, and the difference is noticeable.
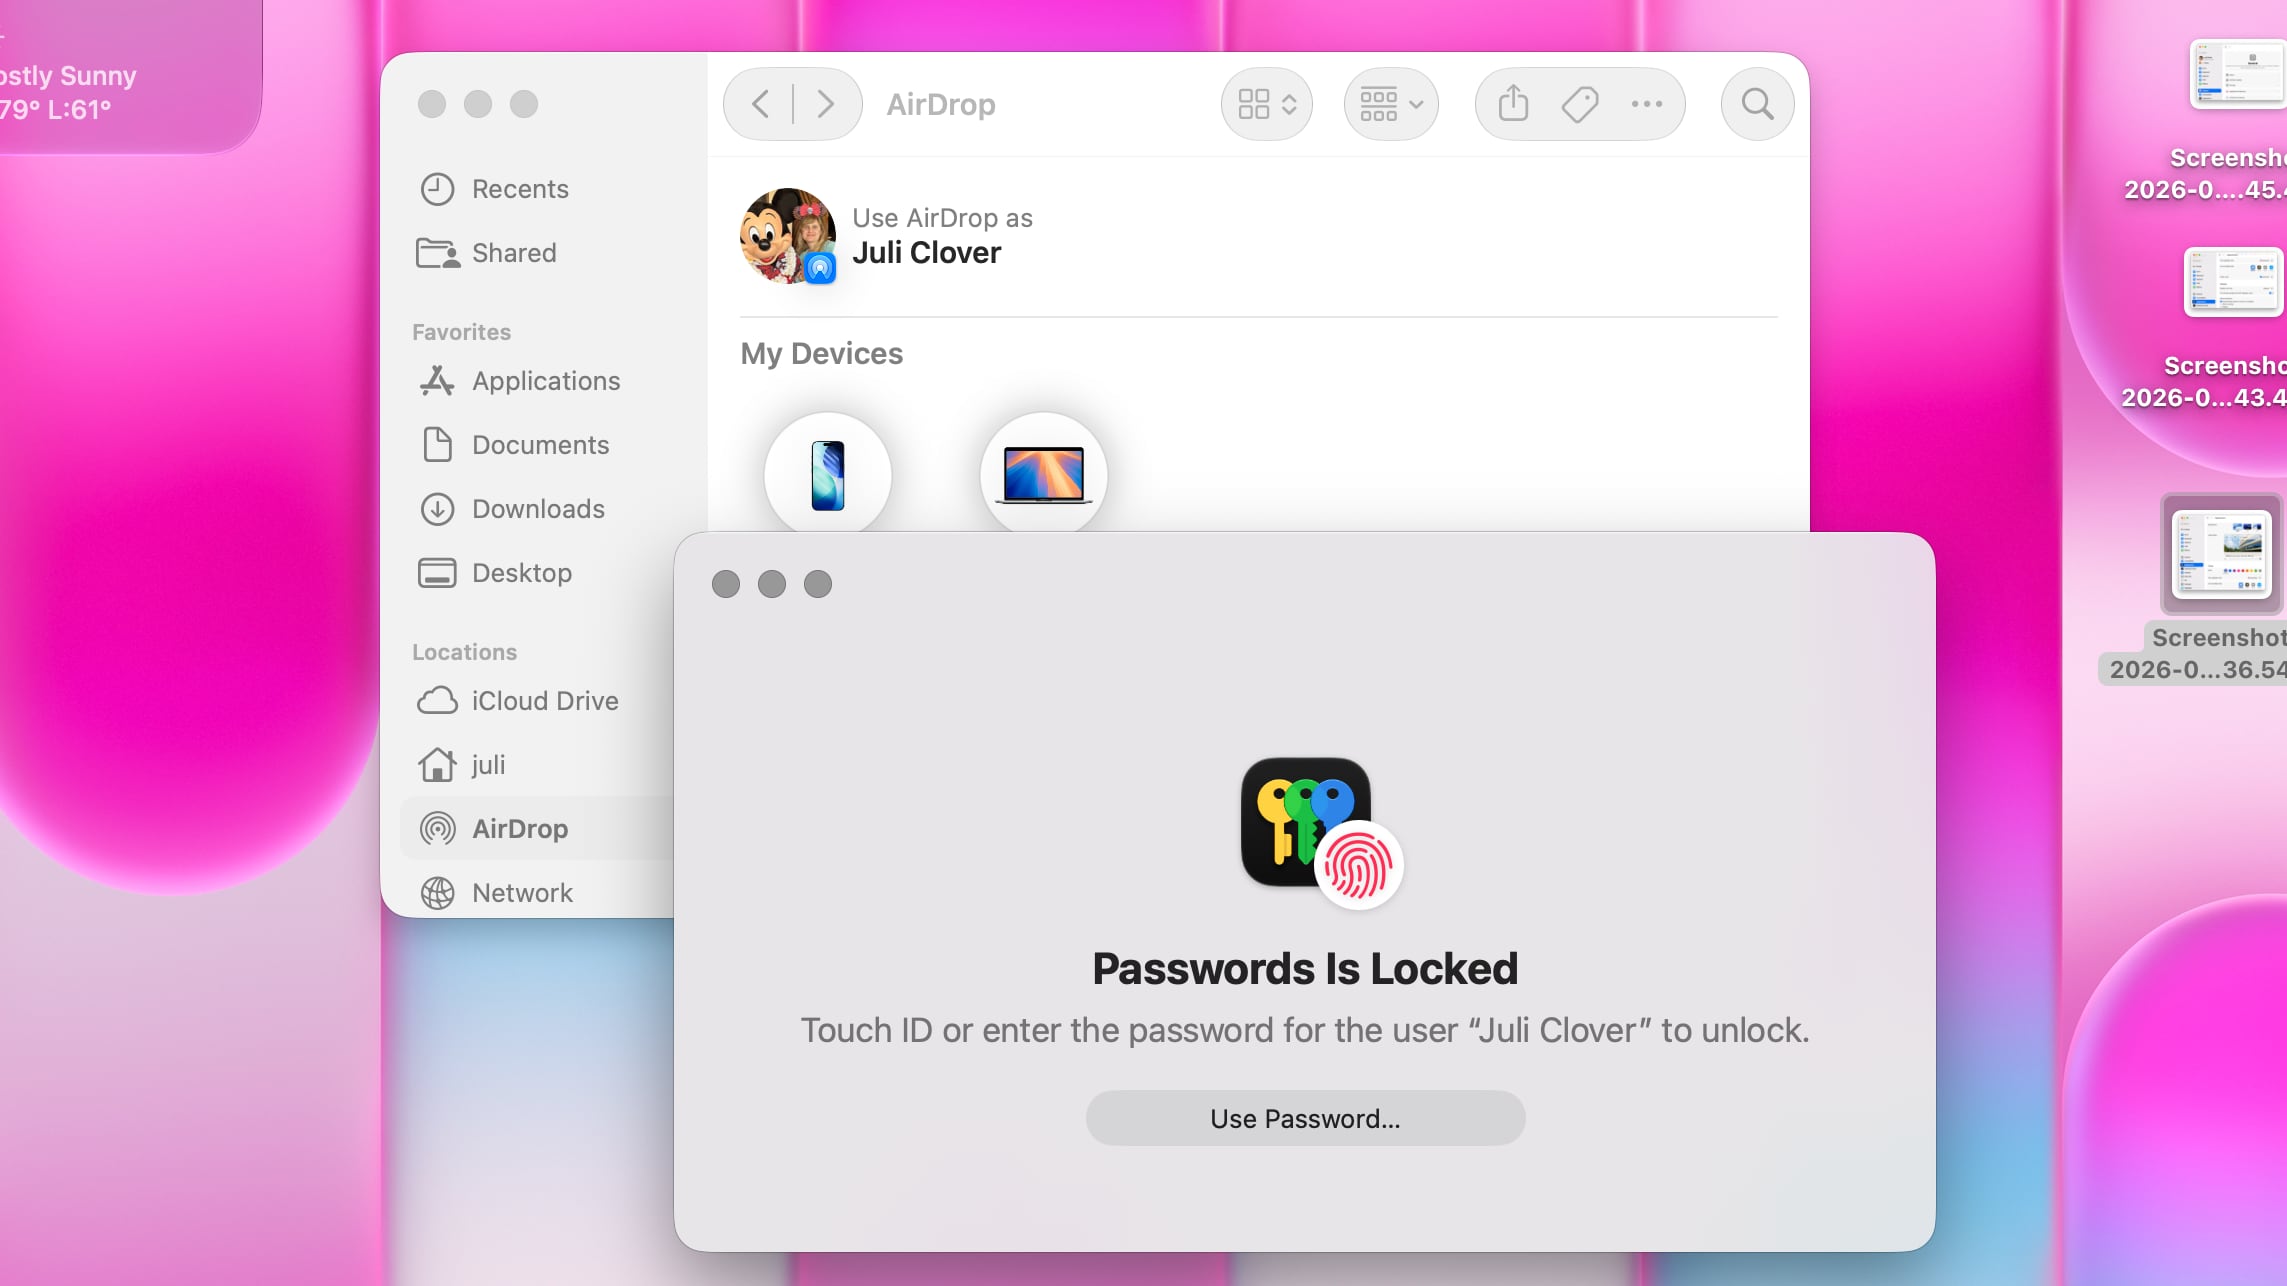 macOS Golden Gate
It's easier to tell when a window is active because of the sidebar design, the opacity update, and changes to window shadows.
Sidebars are no longer floating and are instead edge-to-edge. It's a design that's less distracting and more uniform because there's no unnecessary sidebar shadowing that just takes up space.
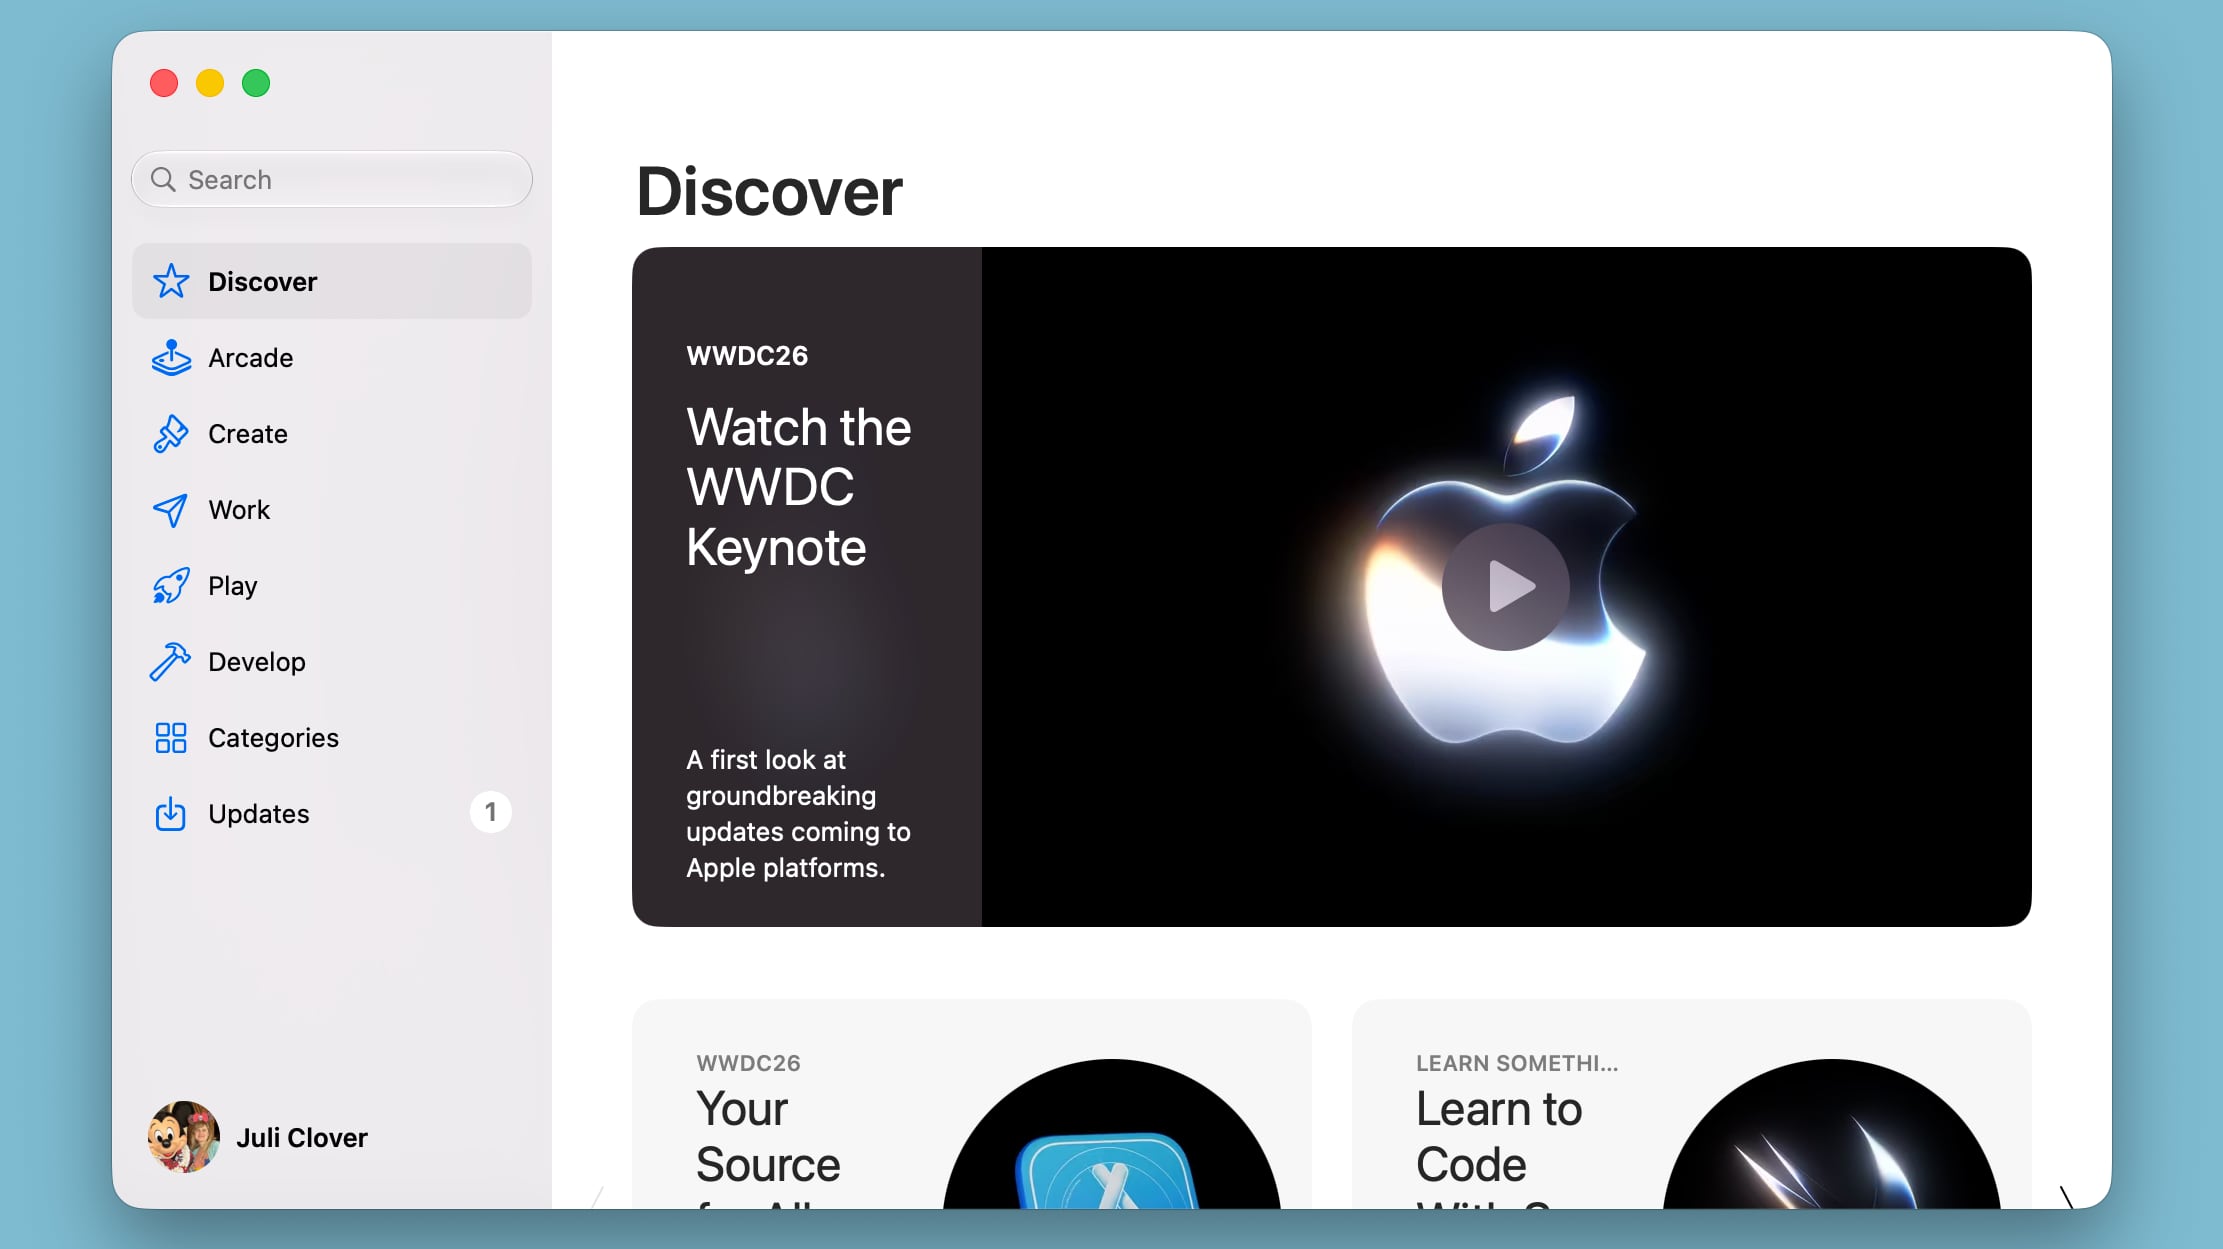
Sidebar icons have color again, which is something Apple removed in macOS Tahoe.
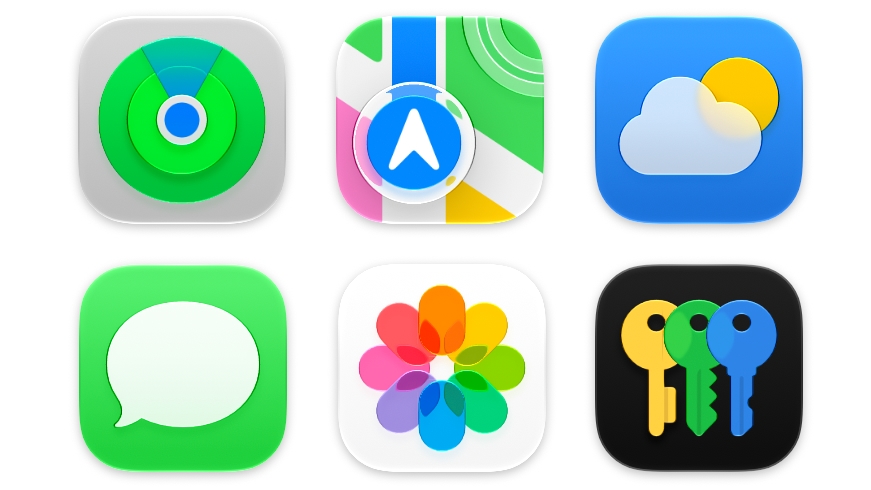
Apple didn't budge on requiring squircle Mac icons, but it did change icon design. Icons have more layers of Liquid Glass to improve detail and sharpness in light, dark, tinted, and clear icon modes.
Apple is also using icons for some menu bar items to make it easier to find commonly used actions.
Apple is using HDR for depth and dimension in the macOS Golden Gate interface.
macOS Golden Gate also includes all of the new Siri AI features coming in iOS 27, along with performance improvements that make the Mac feel faster.
The update is limited to developers right now, but Apple plans to release a public beta in July. macOS Golden Gate will launch this fall.
This article, "All the Liquid Glass Changes in macOS Golden Gate" first appeared on MacRumors.com
Discuss this article in our forums
Apple is making several changes to Liquid Glass and the overall macOS Golden Gate design, and while subtle, some of the changes could make Liquid Glass on Mac easier to digest.
Transparency and Diffusion
Apple added a full Liquid Glass slider under System Settings > Appearance. It changes the translucency of Liquid Glass elements, and users can choose a clear version of Liquid Glass that allows some of the background to show through, select a more opaque, tinted version that improves the legibility of text, or choose something in between.
Unfortunately, there is no ultra-clear version of Liquid Glass available with the slider. Even the setting that's as clear as possible does not match the original version of Liquid Glass that Apple showed off at WWDC 2025.
Apple changed the overall Liquid Glass opacity, and it now diffuses complex content more effectively. Apple says a darkened edge and brighter specular highlights establish more depth and separation for the UI.
Toolbars and Window Shapes
Apps have uniform toolbars to make text headings and groups of controls more legible. Windows also all have the same corner radius for more consistency between apps.
macOS TahoeCorners of apps are not as dramatically rounded in macOS Golden Gate, and the difference is noticeable.
macOS Golden GateIt's easier to tell when a window is active because of the sidebar design, the opacity update, and changes to window shadows.
Sidebars
Sidebars are no longer floating and are instead edge-to-edge. It's a design that's less distracting and more uniform because there's no unnecessary sidebar shadowing that just takes up space.
Sidebar icons have color again, which is something Apple removed in macOS Tahoe.
Icons
Apple didn't budge on requiring squircle Mac icons, but it did change icon design. Icons have more layers of Liquid Glass to improve detail and sharpness in light, dark, tinted, and clear icon modes.
Apple is also using icons for some menu bar items to make it easier to find commonly used actions.
HDR
Apple is using HDR for depth and dimension in the macOS Golden Gate interface.
Launch Date
macOS Golden Gate also includes all of the new Siri AI features coming in iOS 27, along with performance improvements that make the Mac feel faster.
The update is limited to developers right now, but Apple plans to release a public beta in July. macOS Golden Gate will launch this fall.
Related Roundup: macOS Golden Gate
This article, "All the Liquid Glass Changes in macOS Golden Gate" first appeared on MacRumors.com
Discuss this article in our forums
Recommended Comments
Join the conversation
You can post now and register later. If you have an account, sign in now to post with your account.