_811205.png)
_e196d8.png)
_32b3d9.png)
_1c53fe.png)

The Wallet app in iOS 27 has a new "Create a Pass" option that's designed to let you add passes for tickets, memberships, and more using Visual Intelligence. If you have a ticket for an event and there's not a digital version available in the Wallet app already, you can create one using the physical pass.
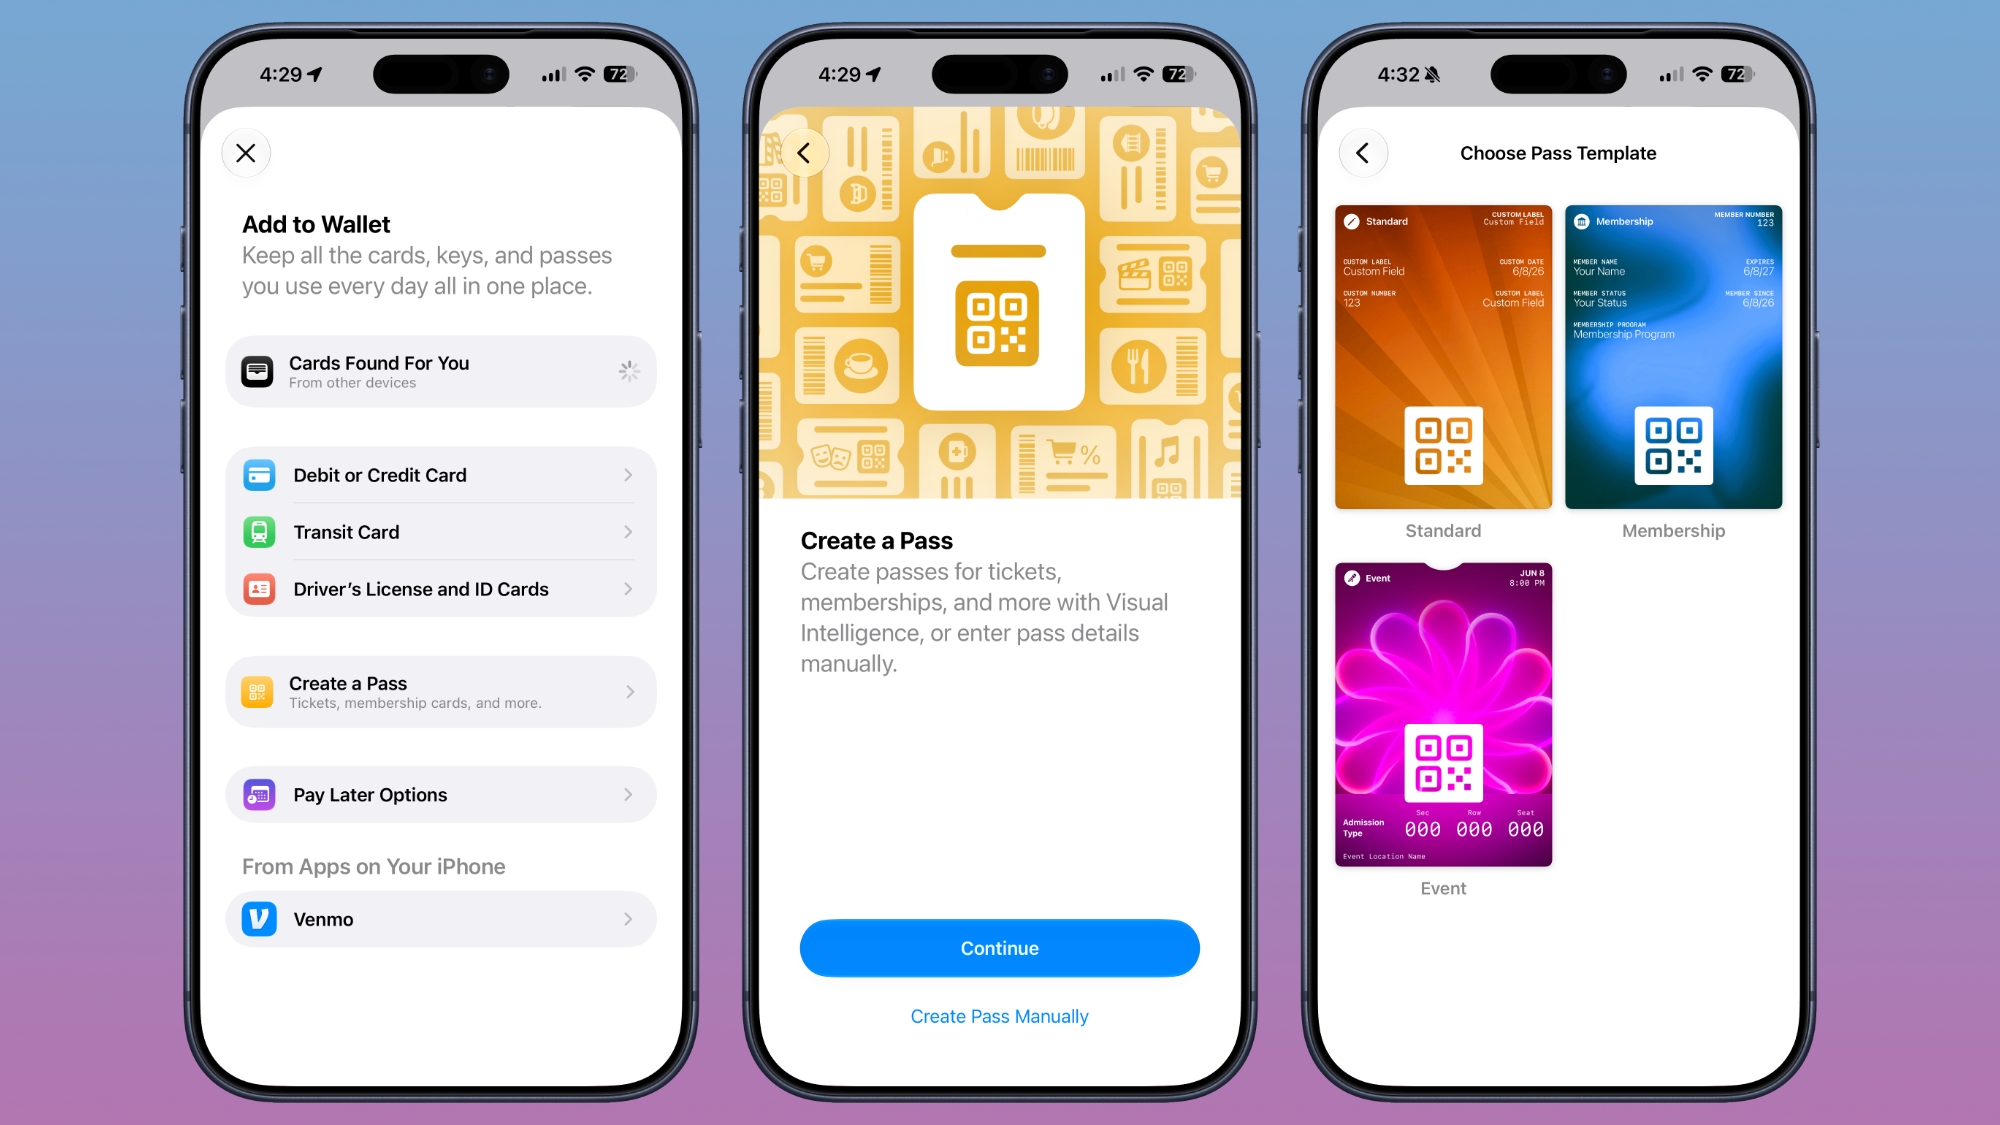
By default, the Wallet app uses Visual Intelligence to scan a pass and add it, but there's also a "Create Pass Manually" option. Pass templates include Standard, Membership, and Event.
Each type includes relevant information like name, location, or admission type, along with a scannable code drawn from an included barcode or QR code that you take a photo of. There are 12 background colors to choose from, or seven custom backgrounds for categories like theater, music, sports, and movies.
Fields can be added or removed as needed when creating a custom pass, with options like label, date, membership, contact, coupon code, VIN, insurance, and more, so most physical cards should be able to be stored digitally.
This article, "iOS 27 Wallet App Gets 'Create a Pass' Feature" first appeared on MacRumors.com
Discuss this article in our forums
By default, the Wallet app uses Visual Intelligence to scan a pass and add it, but there's also a "Create Pass Manually" option. Pass templates include Standard, Membership, and Event.
Each type includes relevant information like name, location, or admission type, along with a scannable code drawn from an included barcode or QR code that you take a photo of. There are 12 background colors to choose from, or seven custom backgrounds for categories like theater, music, sports, and movies.
Fields can be added or removed as needed when creating a custom pass, with options like label, date, membership, contact, coupon code, VIN, insurance, and more, so most physical cards should be able to be stored digitally.
Related Roundup: iOS 27
This article, "iOS 27 Wallet App Gets 'Create a Pass' Feature" first appeared on MacRumors.com
Discuss this article in our forums
Recommended Comments
Join the conversation
You can post now and register later. If you have an account, sign in now to post with your account.